Releases
17 results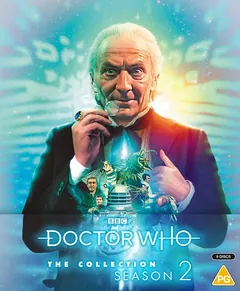
-
Behind the Sofa
Doctor Who alumni react to classic clips from "The Rescue"
-
Maureen O'Brien In Conversation
Matthew Sweet talks with actor, Maureen O'Brien
-
PDF Materials
John Cura Tele-Snaps for "The Rescue" episodes one and two, 4 pages
-
PDF Materials
Studio floor plan for "The Rescue", 2 pages
-
PDF Materials
Archive of "The Rescue" production documentation, 211 pages
-
PDF Materials
Draft script for "Doctor Who and Tanni" Episode 1, 21 pages
-
PDF Materials
Camera script for "The Rescue" Episode 1, 52 pages
-
PDF Materials
Camera script for "The Rescue" Episode 2, 56 pages
-
The Storyteller
Trailer for the release of the "Doctor Who - The Collection: Season 2" blu-ray boxset
-
Behind the Sofa
Doctor Who alumni react to classic clips from "The Romans"
-
PDF Materials
John Cura Tele-Snaps for "The Romans" episodes one to four, 8 pages
-
PDF Materials
Camera script for "The Romans" Episode 1, 52 pages
-
PDF Materials
Camera script for "The Romans" Episode 2, 55 pages
-
PDF Materials
Camera script for "The Romans" Episode 3, 64 pages
-
PDF Materials
Camera script for "The Romans" Episode 4, 61 pages
-
PDF Materials
Studio floor plan for "The Romans", 2 pages
-
PDF Materials
Design drawing for "The Romans", 1 page
-
PDF Materials
Archive of "The Romans" production documentation, 294 pages
-
Behind the Sofa
Doctor Who alumni react to classic clips from "The Web Planet"
-
PDF Materials
John Cura Tele-Snaps for "The Web Planet" episodes one, three, four, five, and six, 5 pages
-
PDF Materials
Camera script for "The Web Planet" Episode 1, 34 pages
-
PDF Materials
Camera script for "The Web Planet" Episode 2, 33 pages
-
PDF Materials
Camera script for "The Web Planet" Episode 3, 28 pages
-
PDF Materials
Camera script for "The Web Planet" Episode 4, 29 pages
-
PDF Materials
Camera script for "The Web Planet" Episode 5, 26 pages
-
PDF Materials
Camera script for "The Web Planet" Episode 6, 27 pages
-
PDF Materials
Studio floor plan for "The Web Planet", 5 pages
-
PDF Materials
Archive of "The Web Planet" production documentation, 378 pages
-
PDF Materials
Radio Times material for "The Web Planet", 12 pages
-
Studio clock
Production slate used for "The Web Planet" Episode 1
-
Descriptive Subtitles - Episodes 2 and 4
Descriptive subtitles for reconstructed episodes 2 and 4 of "The Crusade"
-
Episode Commentary - Episodes 1 and 3
Discussing original episode 1, "The Lion"
-
Episode Info Text
Production information and story facts presented via subtitles on all episodes
-
Episode Narration - Episodes 2 and 4
Explanatory soundtrack for episodes 2 and 4
-
Looking for David
Who was David Whitaker? with Toby Hadoke
-
PDF Materials
John Cura Tele-Snaps for "The Crusade" episodes one to four, 6 pages
-
PDF Materials
Camera script for "The Crusade" Episode 1, 44 pages
-
PDF Materials
Camera script for "The Crusade" Episode 2, 41 pages
-
PDF Materials
Camera script for "The Crusade" Episode 3, 42 pages
-
PDF Materials
Camera script for "The Crusade" Episode 4, 45 pages
-
PDF Materials
Archive of "The Crusade" production documentation, 7 pages
-
PDF Materials
Radio Times material for "The Crusade", 10 pages
-
Photo Gallery
Photos from the production of "The Crusade", set to background music and sound effects
-
Sylvester McCoy Links
Links for episode 3, "The Wheel of Fortune", presented by Sylvester McCoy for the "The Hartnell Years" VHS release in 1991
-
Telesnaps Gallery
Collection of John Cura's telesnap images for "The Crusade" Episode 2 - "The Knight of Jaffa"
-
Telesnaps Gallery
Collection of John Cura's telesnap images for "The Crusade" Episode 4 - "The Warlords"
-
The Panopticon Archives
Carole Ann Ford, Jacqueline Hill, Adrienne Hill, Michael Craze, recorded 6 April 1985
-
BBC Continuity
Brief introduction to "The Space Museum" Episode 1
-
Collectibles Documentary
Doctor Who and The Collectors, Part 1: The 1960s - a look at Doctor Who merchandise that was released in the 1960s
-
PDF Materials
Archive of "The Space Museum" production documentation, 30 pages
-
PDF Materials
Rehearsal script for "The Space Museum" Episode 1, 37 pages
-
PDF Materials
Rehearsal script for "The Space Museum" Episode 2, 32 pages
-
PDF Materials
Rehearsal script for "The Space Museum" Episode 3, 37 pages
-
PDF Materials
Rehearsal script for "The Space Museum" Episode 4, 35 pages
-
PDF Materials
Camera script for "The Space Museum" Episode 1, 44 pages
-
PDF Materials
Camera script for "The Space Museum" Episode 2, 43 pages
-
PDF Materials
Camera script for "The Space Museum" Episode 3, 51 pages
-
PDF Materials
Camera script for "The Space Museum" Episode 4, 43 pages
-
Behind the Sofa
Doctor Who alumni react to classic clips from "The Chase"
-
PDF Materials
Design drawings for "The Chase", 6 pages
-
PDF Materials
Camera script for "The Chase" Episode 1, 36 pages
-
PDF Materials
Camera script for "The Chase" Episode 2, 30 pages
-
PDF Materials
Camera script for "The Chase" Episode 3, 31 pages
-
PDF Materials
Camera script for "The Chase" Episode 4, 28 pages
-
PDF Materials
Camera script for "The Chase" Episode 5, 32 pages
-
PDF Materials
Camera script for "The Chase" Episode 6, 28 pages
-
PDF Materials
Studio floor plans for "The Chase", 7 pages
-
PDF Materials
Archive of "The Chase" production documentation, 435 pages
-
PDF Materials
Doctor Who and the Daleks sweet cigarette cards, 125 pages
-
The Wayne & Shuster Show
"The Machine That Conquered The World ... based on the hit Broadway musical ... Hello Dalek!" First broadcast on 4 September 1965
-
BBC Trails & Continuities
Trails and continuity from a repeat showing of "The Time Meddler", on BBC2, in January 1992
-
Behind the Sofa
Doctor Who alumni react to classic clips from "The Time Meddler"
-
PDF Materials
John Cura Tele-Snaps for "The Time Meddler" episodes one to four, 4 pages
-
PDF Materials
Camera script for "The Time Meddler" Episode 1, 45 pages
-
PDF Materials
Camera script for "The Time Meddler" Episode 2, 48 pages
-
PDF Materials
Camera script for "The Time Meddler" Episode 3, 49 pages
-
PDF Materials
Camera script for "The Time Meddler" Episode 4, 44 pages
-
PDF Materials
Studio floor plans for "The Time Meddler", 4 pages
-
PDF Materials
Archive of "The Time Meddler" production documentation, 225 pages
-
Season 2 Documentary
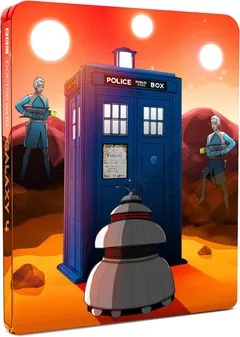
Flight Through Eternity - The story of Season 2
-
Animated Episode
Episode 1 presented in black & white
-
Animated Episode
Episode 2 presented in black & white
-
Animated Episode
Episode 3 presented in black & white
-
Animated Episode
Episode 4 presented in black & white
-
Animated Episode
Episode 1 presented in colour
-
Animated Episode
Episode 2 presented in colour
-
Animated Episode
Episode 3 presented in colour
-
Animated Episode
Episode 4 presented in colour
-
Commentary
Discussing original episode 1 extract
-
Commentary
Discussing animated episode 1
-
Commentary
Discussing animated episode 1
-
Commentary
Discussing animated episode 2
-
Commentary
Discussing animated episode 3
-
Commentary
Discussing original episode 3
-
Commentary
Discussing animated episode 4
-
Commentary
Discussing animated episode 4
-
Commentary
Discussing animated episode 1
-
Commentary
Discussing animated episode 1
-
Commentary
Discussing animated episode 2
-
Commentary
Discussing animated episode 3
-
Commentary
Discussing animated episode 4
-
Commentary
Discussing animated episode 4
-
Episode Info Text
Production information and story facts presented via subtitles on all episodes
-
Episode Info Text
Production information and story facts presented via subtitles on all episodes
-
Finding Galaxy 4
A discussion on the recovery of portions of this serial
-
Galaxy 4 Photo Gallery
Photos from the production of this serial set to background sound effects
-
Original Episode
Episode 3
-
Original Episode Extract
Episode 1 extract
-
PDF Material
Radio Times listings and articles
-
PDF Material
Camera script for episode 1
-
PDF Material
Camera script for episode 2
-
PDF Material
Camera script for episode 3
-
PDF Material
Camera script for episode 4
-
Photographic Reconstruction
Reconstruction of episode 1 (with optional narration)
-
Photographic Reconstruction
Reconstruction of episode 2 (with optional narration)
-
Photographic Reconstruction
Reconstruction of episode 4 (with optional narration)
-
The Trouble with Chumblies - Making Galaxy 4
Cast and crew discuss the making of "Galaxy 4"
-
Trailer
Teaser trailer for the release of "Galaxy 4"
-
Animated Episode
Episode 1 presented in black & white
-
Animated Episode
Episode 2 presented in black & white
-
Animated Episode
Episode 3 presented in black & white
-
Animated Episode
Episode 4 presented in black & white
-
Animated Episode
Episode 1 presented in colour
-
Animated Episode
Episode 2 presented in colour
-
Animated Episode
Episode 3 presented in colour
-
Animated Episode
Episode 4 presented in colour
-
Commentary
Discussing original episode 1 extract
-
Commentary
Discussing animated episode 1
-
Commentary
Discussing animated episode 1
-
Commentary
Discussing animated episode 2
-
Commentary
Discussing animated episode 3
-
Commentary
Discussing original episode 3
-
Commentary
Discussing animated episode 4
-
Commentary
Discussing animated episode 4
-
Commentary
Discussing animated episode 1
-
Commentary
Discussing animated episode 1
-
Commentary
Discussing animated episode 2
-
Commentary
Discussing animated episode 3
-
Commentary
Discussing animated episode 4
-
Commentary
Discussing animated episode 4
-
Episode Info Text
Production information and story facts presented via subtitles on all episodes
-
Episode Info Text
Production information and story facts presented via subtitles on all episodes
-
Finding Galaxy 4
A discussion on the recovery of portions of this serial
-
Galaxy 4 Photo Gallery
Photos from the production of this serial set to background sound effects
-
Original Episode
Episode 3
-
Original Episode Extract
Episode 1 extract
-
O-Ring Sleeve
The disc case is wrapped in a specially-designed cardboard "O-Ring" sleeve
-
PDF Material
Radio Times listings and articles
-
PDF Material
Camera script for episode 1
-
PDF Material
Camera script for episode 2
-
PDF Material
Camera script for episode 3
-
PDF Material
Camera script for episode 4
-
Photographic Reconstruction
Reconstruction of episode 1 (with optional narration)
-
Photographic Reconstruction
Reconstruction of episode 2 (with optional narration)
-
Photographic Reconstruction
Reconstruction of episode 4 (with optional narration)
-
Reversible Cover
Double-sided cover with the original "grey roundels" design on one side, and a version with updated logos and/or design on the other
-
The Trouble with Chumblies - Making Galaxy 4
Cast and crew discuss the making of "Galaxy 4"
-
Trailer
Teaser trailer for the release of "Galaxy 4"
-
Animated Episode
Episode 1 presented in black & white
-
Animated Episode
Episode 2 presented in black & white
-
Animated Episode
Episode 3 presented in black & white
-
Animated Episode
Episode 4 presented in black & white
-
Animated Episode
Episode 1 presented in colour
-
Animated Episode
Episode 2 presented in colour
-
Animated Episode
Episode 3 presented in colour
-
Animated Episode
Episode 4 presented in colour
-
Commentary
Discussing original episode 1 extract
-
Commentary
Discussing animated episode 1
-
Commentary
Discussing animated episode 1
-
Commentary
Discussing animated episode 2
-
Commentary
Discussing animated episode 3
-
Commentary
Discussing original episode 3
-
Commentary
Discussing animated episode 4
-
Commentary
Discussing animated episode 4
-
Commentary
Discussing animated episode 1
-
Commentary
Discussing animated episode 1
-
Commentary
Discussing animated episode 2
-
Commentary
Discussing animated episode 3
-
Commentary
Discussing animated episode 4
-
Commentary
Discussing animated episode 4
-
Episode Info Text
Production information and story facts presented via subtitles on all episodes
-
Episode Info Text
Production information and story facts presented via subtitles on all episodes
-
Finding Galaxy 4
A discussion on the recovery of portions of this serial
-
Galaxy 4 Photo Gallery
Photos from the production of this serial set to background sound effects
-
Original Episode
Episode 3
-
Original Episode Extract
Episode 1 extract
-
O-Ring Sleeve
The disc case is wrapped in a specially-designed cardboard "O-Ring" sleeve
-
PDF Material
Radio Times listings and articles
-
PDF Material
Camera script for episode 1
-
PDF Material
Camera script for episode 2
-
PDF Material
Camera script for episode 3
-
PDF Material
Camera script for episode 4
-
Photographic Reconstruction
Reconstruction of episode 1 (with optional narration)
-
Photographic Reconstruction
Reconstruction of episode 2 (with optional narration)
-
Photographic Reconstruction
Reconstruction of episode 4 (with optional narration)
-
Reversible Cover
Double-sided cover with the original "grey roundels" design on one side, and a version with updated logos and/or design on the other
-
The Trouble with Chumblies - Making Galaxy 4
Cast and crew discuss the making of "Galaxy 4"
-
Trailer
Teaser trailer for the release of "Galaxy 4"
-
A Holiday for the Doctor
Ida Barr takes a humorous look at how actors were allowed time off in classic Doctor Who
-
Coming Soon
Trailer for the release of the the "Myths and Legends" boxset, which includes "The Time Monster", "Underworld", and "The Horns of Nimon"
-
Commentary
Discussing episodes 1, "The Space Museum", 3, "The Search", and 4, "The Final Phase"
-
Commentary
Discussing episode 2, "Dimensions of Time"
-
Defending the Museum
Robert Shearman provides a critical defence of this serial
-
Info Text
Production information and story facts presented via subtitles on all episodes
-
My Grandfather, The Doctor
Jessica Carney talks about her grandfather, William Hartnell
-
PDF Materials
Radio Times Listings
-
Reversible Cover
Double-sided cover with the original "grey roundels" design on one side, and a version with updated logos and/or design on the other
-
The Space Museum Photo Gallery
Photos from the production of this serial set to background sound effects
-
Coming Soon
Trailer for the release of the the "Myths and Legends" boxset, which includes "The Time Monster", "Underworld", and "The Horns of Nimon"
-
Commentary
Discussing episodes 1, "The Executioners", 5, "The Death of Doctor Who", and 6, "The Planet of Decision"
-
Commentary
Discussing episode 2, "The Death of Time"
-
Commentary
Discussing episode 3, "Flight Through Eternity"
-
Commentary
Discussing episode 4, "Journey Into Terror"
-
Cusick in Cardiff
Raymond Cusick pays a visit to the Doctor Who studios in Cardiff, in February 2008
-
Daleks Beyond the Screen
A look at Dalek merchandising
-
Daleks Conquer and Destroy
What is the Daleks appeal?
-
Easter Egg
ENTER +++ ENTER +++ ZERO +++ STOP - The crew discuss the Mechonoids
-
Follow that Dalek
Silent 8mm cine film from 1967, documenting Shawcraft Models
-
Follow That Dalek Info Text
Production information and facts presented via subtitles
-
Give-a-Show Slides
Presented with music and sound effects
-
Info Text
Production information and story facts presented via subtitles on all episodes
-
Last Stop White City
The story of Ian Chesterton and Barbara Wright
-
PDF Materials
Radio Times listings
-
Reversible Cover
Double-sided cover with the original "grey roundels" design on one side, and a version with updated logos and/or design on the other
-
Shawcraft - The Original Monster Makers
A look at the work of Shawcraft Models in the 1960s
-
The Chase Photo Gallery
Photos from the production of this serial set to background sound effects
-
The Thrill of the Chase with Richard Martin
The director, Richard Martin, looks back at this serial
-
Coming Soon
Trailer for the release of "Attack of the Cybermen"
-
Commentary
Discussing all episodes
-
Info Text
Production information and story facts presented via subtitles on all episodes
-
Mounting the Rescue
Cast and crew discuss the making of "The Rescue"
-
Radio Times Listings
Radio Times billings for this serial
-
Raymond Cusick's Original Design Drawings
TARDIS and rocket ship designs
-
The Rescue Photo Gallery
Photos from the production of this serial set to background sound effects
-
Blue Peter
A Roman banquet is held in the studio
-
Coming Soon
Trailer for the release of "Attack of the Cybermen"
-
Commentary
Discussing episode 1, "The Slave Traders"
-
Commentary
Discussing episode 2, "All Roads Lead to Rome"
-
Commentary
Discussing episode 3, "Conspiracy"
-
Commentary
Discussing episode 4, "Inferno"
-
Dedication
A dedication to Verity Lambert, "For Verity Lambert The Original Doctor Who Girl 1935-2007", is shown after the credits for "Girls! Girls! Girls! The 1960s"
-
Dedication
A dedication to Dennis Spooner, "For Dennis", is shown after the credits for "Dennis Spooner - Wanna Write A Television Series?"
-
Dennis Spooner - Wanna Write A Television Series?
Cast and crew discuss the work of Dennis Spooner
-
Girls! Girls! Girls! The 1960s
A look back at the female companions of the 1960s
-
Info Text
Production information and story facts presented via subtitles on all episodes
-
Radio Times Listings
Radio Times billings for this serial
-
Roma Parva
Christopher Barry demonstrates the use of a model studio to plan camera positions for recording
-
The Romans Photo Gallery
Photos from the production of this serial set to background sound effects
-
What has "The Romans" ever done for us?
Cast and crew discuss the making of "The Romans"
-
Coming Soon
Trailer for the release of "The Five Doctors: 25th Anniversary Edition"
-
Commentary
Discussing all episodes
-
Info Text
Production information and story facts presented via subtitles on all episodes
-
Radio Times Listings
Radio Times billings for this serial
-
Stripped for Action - The Story of Doctor Who Comics - The First Doctor
The First Doctor's comic strip adventures
-
The Lost Twelve Seconds
Lost footage recreated using an off-air audio recording and original script
-
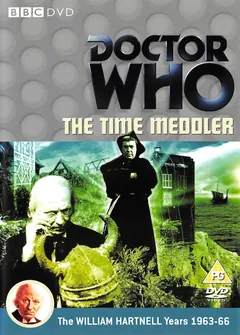
The Time Meddler Photo Gallery
Photos from the production of this serial set to background sound effects
-
The Time Meddler Restoration Before & After
Comparison examples of how this serial was restored
-
Verity Lambert Obituary
An obituary discussing the career of Verity Lambert, presented via the DVD menu
-
Verity Lambert Photo Gallery
A collection of photos of Verity Lambert
-
Alternative Spanish Soundtrack
For episode 6
-
Commentary
Discussing episode 6, "The Centre"
-
Commentary
Discussing episode 1, "The Web Planet"
-
Commentary
Discussing episode 2, "The Zarbi"
-
Commentary
Discussing episode 3, "Escape to Danger"
-
Commentary
Discussing episode 4, "Crater of Needles"
-
Commentary
Discussing episode 5, "Invasion"
-
Doctor Who Annual PDF's
Doctor Who Annual 1965
-
Doctor Who Annual PDF's
A message from the Doctor on how to read the PDFs (presented in text format)
-
Give-A-Show Slides
Viewable from the DVD menu (14 in total)
-
Information Text
Production information and story facts presented via subtitles
-
Tales of Isop
Cast and crew discuss the making of "The Web Planet"
-
The Lair of the Zarbi Supremo read by William Russell
Taken from the Doctor Who Annual 1965
-
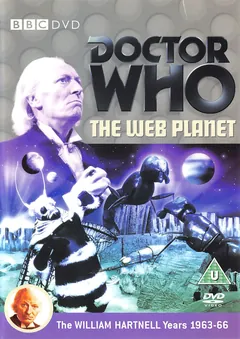
The Web Planet Photo Gallery
Photos from the production of this serial set to background sound effects
-
Commentary
Discussing episode 3, "The Wheel of Fortune"
-
Easter Egg
Test card and production slate for episode 3 of The Crusade
-
Easter Egg
Introduction to episode 1 - "The Lion" - by William Russell, in character, as Ian Chesterton
-
Easter Egg
Introduction to episode 2 - "The Knight of Jaffa" by William Russell, in character, as Ian Chesterton
-
Easter Egg
Epilogue to episode 3 - "The Wheel of Fortune" by William Russell, in character, as Ian Chesterton
-
The Crusade, Episode 1 - "The Lion"
Orphaned episode
-
The Crusade, Episode 2 - "The Knight of Jaffa" (audio only)
Soundtrack only version of episode 2
-
The Crusade, Episode 3 - "The Wheel of Fortune"
Orphaned episode
-
The Crusade, Episode 4 - "The Warlords" (audio only)
Soundtrack only version of episode 4